Step One:
Start Kali Linux and login to the root user.
Step Two:
Open a Terminal and type: leafpad /etc/ettercap/etter.conf Start Kali Linux and login to the root user.
Step Two:
Step Three:
Look through the text file that just opened. On one of the first lines, under the [privs] section, look for the words highlighted below:

You need to change these lines to this: 
By removing the number 65534 and replacing it with 0 (zero). You can leave the “# nobody is default” line. Step Four:This next one will be tricky to locate, so we’re going to use the “Find” option. Click on Search in the toolbar at the top of leafpad and click Find.Type the word iptables in the box that appears and click the Find button or press Enter.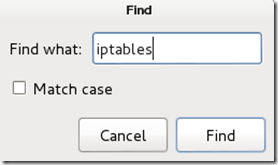
It should skip to a line that looks like this: 
We need to “uncomment” the two bottom lines. To do this, remove the two “#” symbols before each “redir_command,” so that the two lines look like this:
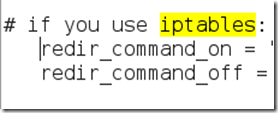
Now close leafpad and click Yes when it asks you to save changes.
Step Five:
Now start Ettercap-gtk, open a Terminal and type ettercap –G
Wait until Ettercap opens. When it does, click Sniff in the toolbar and select Unified Sniffing… from the menu.
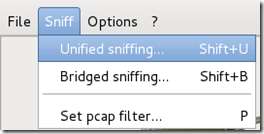
Step Six:
Select the interface that’s connected to the network.
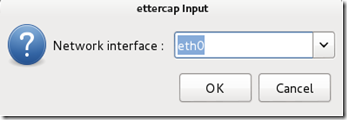
If your using a wired (ethernet) connection, then the interface will probably be eth0, but if you’re using wireless, (WLAN), then it will be a different one. To find which one of your interfaces is connected, run ifconfig.
Step Seven:
Now Ettercap should load into attack mode. Click on Hosts and select Scan for hosts from the menu.
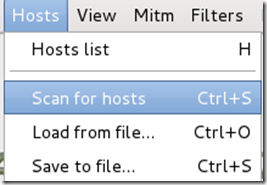
Step Eight:
Ettercap will briefly scan for hosts on the network. After a moment, you should see the words “hosts added to the host list…” in the command box. This is the green light.
Click on Hosts again, and this time select Hosts list from the menu.
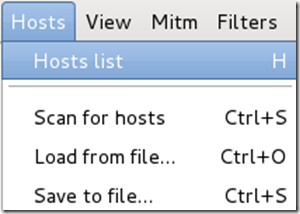
Step Nine:
Click the IP address of the router and click the Add to Target 1 button.

Then select the IP of your test victim’s machine and click Add to Target 2.

Step 10:
Now click Mitm on the toolbar and select Arp poisoning…

When the question box shows up, check the box next to Sniff remote connections and hit OK.

Step 11:
Ettercap will now Arp poison the victim and router. Now if you want to see any of the victim’s personal info, you’ll need to click Start on the toolbar and select Start sniffing.
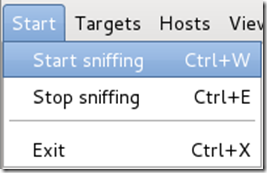
Ettercap will notify you that unified sniffing was started.
You’ve successfully executed an MITM attack!
You can now use tools such as URLsnarf and SSLstrip to sniff out information about your victim’s internet traffic. Tutorials on how to use these tools will be coming soon.
To stop the MITM attack, click on MITM and select Stop mitm attack(s) from the menu.
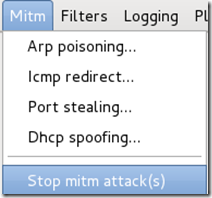
Ettercap will then send the ARP correction packet, and the network will return to normal. You can then close Ettercap.
Ways to protect yourself against one of these attacks.
There are a couple of methods:
- ARP detection software
- Static ARP entries
When an attacker performs an ARP MITM attack, his computer sends a ARP packet to the victim’s machine telling it that his mac address is the router’s. The victim’s machine is fooled and starts sending its data to the attacker.
When you enter a static ARP entry, you’re telling your computer that the router’s mac address is permanent and will not be changed. Therefore, your computer ignores any phony ARP packets sent by the attacker.
We will be making a tutorial on how to do this soon. In the meantime, you can use Google to find answers.
We Hope You Enjoyed This Tutorial
Keep visiting


No comments:
Post a Comment